You order five thousand faucets. You cannot test every single unit. One leaking valve or scratched finish can destroy your brand reputation. You need a trusted method to ensure quality.
AQL stands for Acceptable Quality Limit. It is the industry standard for choosing a random sample size from your production lot. It defines the maximum number of defective units allowed before you reject the whole shipment. This statistical tool balances risk against the cost of inspection.
I use AQL every day to protect my clients. It changes "quality" from a guess into a number. I will explain how I apply this to bathroom products.
How do I choose the right sample size and defect limits?
AQL works on probability. You do not need to check 100% of the goods to know the quality. You just need a representative sample. I adhere to the ISO 2859-1 standard for all my inspections.
I use General Inspection Level II for most orders. I verify Critical defects at AQL 0, Major defects at AQL 2.5, and Minor defects at AQL 4.0. These numbers decide if a shipment leaves the factory or stays for rework.
Breaking down the AQL math
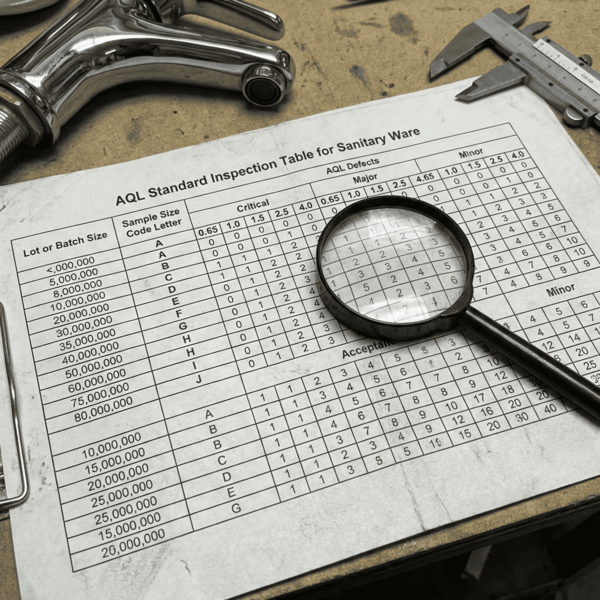
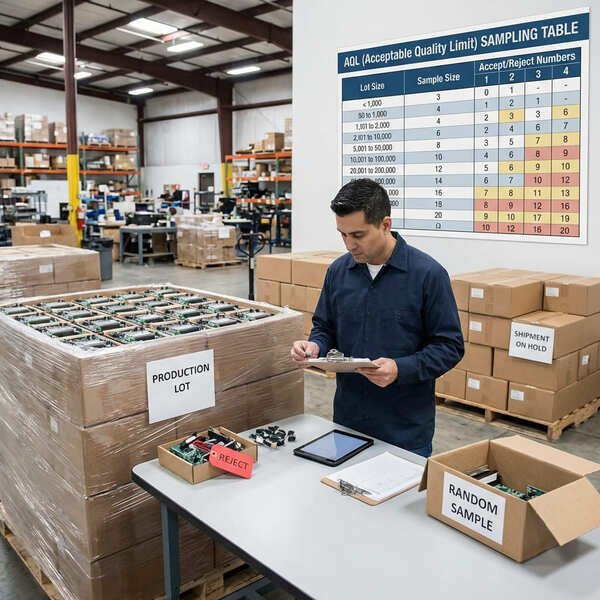
I determine the Lot Size first. This is the total number of items in your order. I look at the AQL table to find the Sample Size Code Letter. For a typical order of 3,000 angle valves, the code is "K". Code K requires me to inspect 125 pieces. I select these 125 pieces randomly. I take them from the top, middle, and bottom of the pallet. I never let the factory choose for me.
I classify defects into three types.
- Critical: The product is dangerous or violates regulations. A sharp edge on a handle is Critical.
- Major: The product fails to work or looks unsold. A leak is a Major defect.
- Minor: The product has a small flaw but works. A tiny scratch on the back is Minor. For Major checks (AQL 2.5), the table tells me the "Accept" and "Reject" numbers. If I find 7 major defects in my 125 valves, the batch passes. If I find 8, the batch fails. I reject the whole order. This system force factories to maintain consistency.
AQL Level Table
| Inspection Level | When I use it | Sample Size (Example: Lot 3000) |
|---|---|---|
| Level I | Budget checks, low risk products | 80 units |
| Level II | Standard (My Default) | 125 units |
| Level III | High value, strict requirement | 315 units |
| S-3 / S-4 | Destructive testing (like salt spray) | 20 units or fewer |
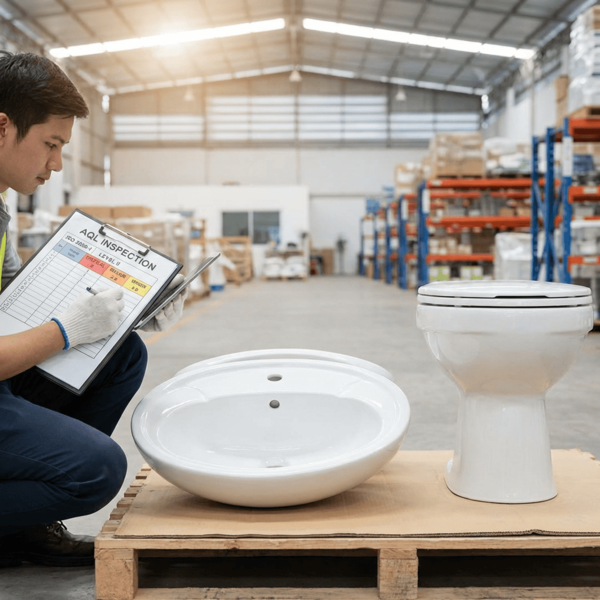
What visual defects do I look for in sanitary ware?
Bathroom products are also decorative. The chrome must shine. The paint must be smooth. Visual inspections are subjective, so I use strict boundary samples.
I inspect for surface finish defects like scratches, pits, and bubbles. I check color consistency between different batches. I verify that logos are straight and clear. I check the thread quality using Go/No-Go gauges.
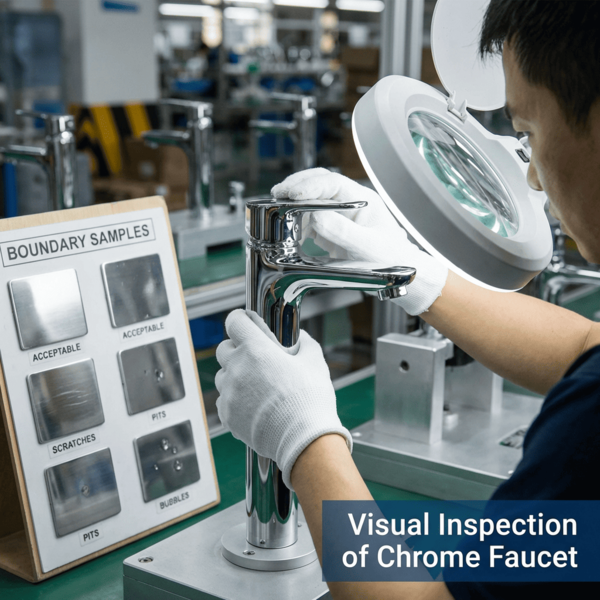
The eyes and hands of the inspector
I start with the "arm's length" rule for appearance. I view the faucet under bright, white light. I look for common plating issues. "Blistering" happens when the plating layer lifts. "Pitting" looks like tiny pinholes. "Burrs" are rough edges left from casting. These ruin the feel of a premium product. I reject any unit with visible damage on the "A-surface" (the top and front).
I also check dimensions. I use digital calipers. I measure the total height, spout reach, and installation hole size. I confirm threads. A G1/2 plumbing thread must fit a standard nut. I use a "Go gauge" (it must screw on) and a "No-Go gauge" (it must stop). If the thread is too loose, it will leak. If it is too tight, the plumber cannot install it. I record these measurements in my report. I compare them against the technical drawing you approved.
Visual Defect Checklist
| Defect Type | Description | Classification (Usually) |
|---|---|---|
| Scratch | Visible line on the finish | Major (if front) / Minor (if back) |
| Pit / Pinhole | Tiny hole in the plating | Major |
| Tool Mark | Dent from assembly tools | Major |
| Color Variance | Shade fails to match sample | Major |
| Sharp Edge | Unfinished metal on handle | Critical (Safety Issue) |
Which functional tests ensure the product actually works?
A beautiful faucet is useless if it drips. Functional testing is the heart of quality control. I simulate real-world usage on the factory floor.
I perform air pressure testing to detect leaks in the casting. I check the ceramic cartridge life cycle. I verify flow rates at specific pressures. I test the assembly integrity of handles and spouts.

Stopping leaks before they start
I do not trust the factory's internal checks blindly. I select my reliable samples and test them again. The most vital test is the Sealing Test. I connect the valve or faucet to a testing bench. We use high-pressure air (0.6 MPa) or water (1.6 MPa). I close the valve and watch for pressure drops or bubbles. If a bubble appears, the casting has a crack or the seal is bad. This is an automatic fail.
I test the "feel" of the handle. It must move smoothly. It cannot be too stiff or too loose. I check the diverter on shower mixers. It must switch water flow cleanly. I check the aerator. The water stream must be straight and not splash sideways. For braided hoses, I pull on the crimping point to ensure the nut does not detach. I establish a standard for every moving part. If the handle squeaks, I record it. If the spout wobbles, I flag it.
Functional Test List
| Test Name | Method | Success Criteria |
|---|---|---|
| Seal Test | 0.6 MPa Air / 1.6 MPa Water | No bubbles, no drops for 60s |
| Assembly Check | Manual operation | Handle moves smooth, no noise |
| Flow Rate | Timer and measuring cup | Meets L/min spec (e.g., 5.7L/min) |
| Fitting Check | Assemble with accessories | Hoses screw in easily by hand |
| Adhesion Test | Cross-cut tape test on paint | Paint does not peel off |
How does Glowjoy deliver clear inspection results?
You need eyes in the factory. You need a report that helps you make a "Yes" or "No" decision. Glowjoy provides a complete view of the shipment quality.
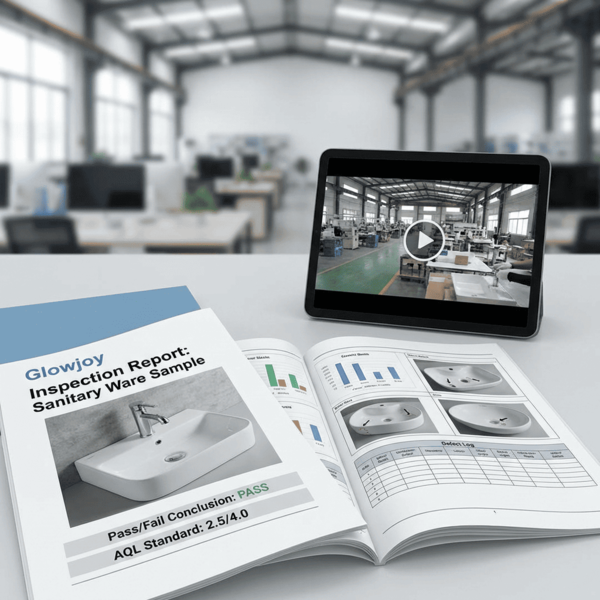
We conduct Pre-Production, Inland, and Final Random Inspections (FRI). We issue a detailed PDF report within 24 hours. The report includes photos, videos, defect logs, and a clear Pass/Fail conclusion based on your AQL standards.
My inspection workflow and report structure
My team starts work before the inspection day. We review your Purchase Order (PO) and approved samples. We book the date with the factory. When I arrive, I count the cartons. I ensure the quantity matches the packing list. If the factory is not ready, I do not waste time inspecting; I reschedule.
I pull the cartons myself. I open them and check the packaging. I verify the barcodes with a scanner. I check the inner box protection. Then, I perform the AQL checks mentioned above.
My report is visual. I do not just write "scratched." I take a high-resolution photo of the scratch. I use a red arrow to point to the defect. I include a video of the leak test. The report summary shows: "Total Samples: 125. Major Defects Found: 2. Result: PASS." If the result is FAIL, I explain why. I advise you on the next step: ask for rework, negotiate a discount, or cancel the order. I act as your firewall.
Glowjoy Inspection Steps
| Step | Action | Outcome |
|---|---|---|
| 1. Booking | Confirm readiness with factory | Inspection date set |
| 2. Sampling | Pick cartons from full pile | Random selection secured |
| 3. Testing | Measure, look, and pressure test | Data for the report |
| 4. Reporting | Compile photos and data | clear PDF sent same day |
| 5. Decision | Consult with client on result | Ship or Rework capability |
Conclusion
Inspection is your insurance. I explain AQL to help you handle risks. We check looks, size, and leaks. Glowjoy reports give you the power to say "Ship it."